Swordland Event Guide

You will find a general guide to the entire event here. Hopefully, it will give you a better overview after reading through it. πŸ™‚

Part 1: What can i basically do in Swordland?

1. Attack a building

You can attack a building by:

  • Solo attacking it
  • Rallying it

2. Burn enemy city

The burning speed in Swordland is much faster than usual. Therefore, burning enemy cities can be very effective. If an enemy is weaker than you, you can significantly reduce their ability to attack buildings by burning their city, forcing them to teleport back to their HQ.

3. Loot (Pictures right side)

Whoever captures a building will continuously earn points, which are displayed above the building. If the building is later captured by an opponent, loot boxes will be dropped on the ground. Try to collect them as quickly as possible. The more points the building has accumulated, the more rewards these loot boxes will provide.

See the pictures.

4. Mining

Undercellars will appear randomly across the map. If you find one, you can send troops to mine it. The longer you mine, the more points you will earn.

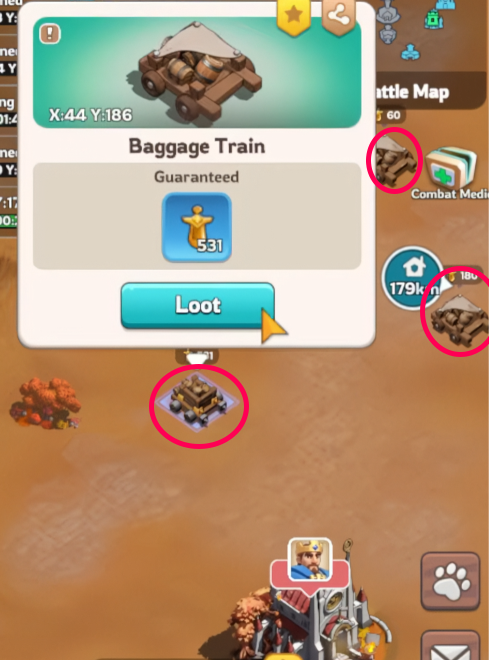
Buildings that have stacked more points will also drop more valuable loot boxes if ownership switches to the opponent's side:

Picture for Loot:

Part 2:  Introduction of Items and Buildings

1. The Big Map

First, take an overview of the Swordland map. πŸ—ΊοΈ

2. Buildings

Below are the details of each building πŸ›οΈ. Occupying a building grants both personal points and alliance points, and each building generates points every minute. Some buildings also provide special bonuses, which will be explained separately below.
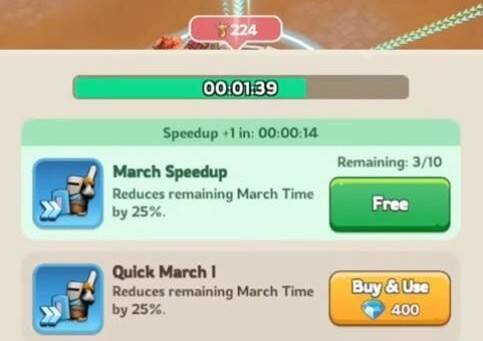
Stables

By first control:

  • Personal Points + 600
  • Alliance Points + 1200

Ongoing Occupation:

  • Personal Points + 120/minute
  • Alliance Points + 240/minute

Special Bonus:

  • Teleport cooldown -50%

Belltower

By first control:

  • Personal Points + 600
  • Alliance Points + 1200

Ongoing Occupation:

  • Personal Points + 120/minute
  • Alliance Points + 240/minute

Special Bonus:

  • Control time of capturing a building -50%

Sanctum

By first control:

  • Personal Points + 3000
  • Alliance Points + 6000

Ongoing Occupation:

  • Personal Points + 600/minute
  • Alliance Points + 1200/minute

Special Bonus:

  • none

Abbey

By first control:

  • Personal Points + 1500
  • Alliance Points + 3000

Ongoing Occupation:

  • Personal Points + 300/minute
  • Alliance Points + 600/minute

Special Bonus:

  • none

Mercenary

By first control:

  • Personal Points + 600
  • Alliance Points + 1200

Ongoing Occupation:

  • Personal Points + 120/minute
  • Alliance Points + 240/minute

Special Bonus:

  • none

Reformation

By first control:

  • Personal Points + 600
  • Alliance Points + 1200

Ongoing Occupation:

  • Personal Points + 120/minute
  • Alliance Points + 240/minute

Special Bonus:

  • All Squads damage +15%
  • All Squads taken damage -15%

Swordshrine

By first control:

  • Personal Points + 4500
  • Alliance Points + 9000

Ongoing Occupation:

  • Personal Points + 900/minute
  • Alliance Points + 1800/minute

Special Bonus:

  • none

Undercellars

It is just a mine for gathering points.

3. Free Items

There are some free items you can use during the battle.

March Speedup

Accelerates your march speed.

Will regenerate every 1 minutes.

Healing Speedup

Accelerates your healing speed.

Will regenerate automatically over time. βš‘πŸƒ‍β™‚οΈπŸƒ‍♀️

Teleport

Teleport to a location.

Will be regenerated every 10 minutes. (if we take the stables then 5 minutes)

Part 3: Battle Phases

Phase 0: Preperation (0 ~ 3 minutes)

You can check the map and take a look of opponent's power distribution.

Phase 1: Early Phase (3 ~ 15 minutes)

The following buildings are open for attack:

  • 2 Sanctums (high point value, near center)
  • 4 Abbeys (moderate point value)
  • Bell Tower (buff building: halves capture time)
  • Royal Stables (buff building: halves teleport cooldown)

You can use the images on the right side to see which buildings will be open during this phase.

Phase 2: Mid Phase (15 ~ 30 minutes)

The following buildings are open for attack:

  • Swordshrine (center, highest point value — the game's most contested objective)
  • Hall of Reformation (buff: +15% attack AND -15% damage reduction for your alliance)
  • Mercenary Camp (lets you send a mercenary strike against an enemy-held building)

You can use the images on the right side to see which buildings will be open during this phase.

Phase 3: Last Phase (30 ~ 60 minutes)

Two waves of Undercellars spawn around the map at the exact timestamps of:

  • 30 minutes (first wave)
  • 35 minutes (second wave)

You can use the images on the right side to see which buildings will be open during this phase.

Part 4: Rewards

Personal Points

There are 4 ways:

  • Kill enemy soldiers
    • As garrion: 40 Points for defeating each 10000 power of enemy soldiers.
    • As attacker: 80 Points for defeating each 10000 power of enemy soldiers.
    • This is the most effective way to earn personal points.
    • This will only give you personal points, no alliance points.
  • Attack/garrison a building
    • First capture will give you extra points.
    • You gain points automatically by garrison a building over time.
  • Loot
  • Mining in Undercellars


Alliance Points

There are 3 ways:

  • Attack/garrison a building
    • First capture will give the alliance extra points.
    • Alliance points are earned automatically over time from all buildings currently under our control. πŸ›οΈπŸ“ˆ
  • Loot
  • Mining in Undercellars


We also have some important tips to help you maximize your personal rewards. Take a look at the following link: 😊

Create Your Own Website With Webador