

Strategy Overview
We will provide an overview of our strategy here. It is intended to give you a general idea of our plan in case you become unsure during the battle.
However, please always follow the labels issued during the battle, as our tactics will be adjusted dynamically based on our opponents' strength and movements. ⚔️🏰
Instructions (Labels)
Each member will be assigned to a team and is expected to follow the instructions given during the battle. The instructions are very simple: when you see your team's label on a building, march your troops toward that building. Labels may be updated dynamically as the battle progresses, so it is important to check them frequently.
Below, you will find what each label means and how to quickly find the latest labels. 👇🏷️
1. Labels with their meaning

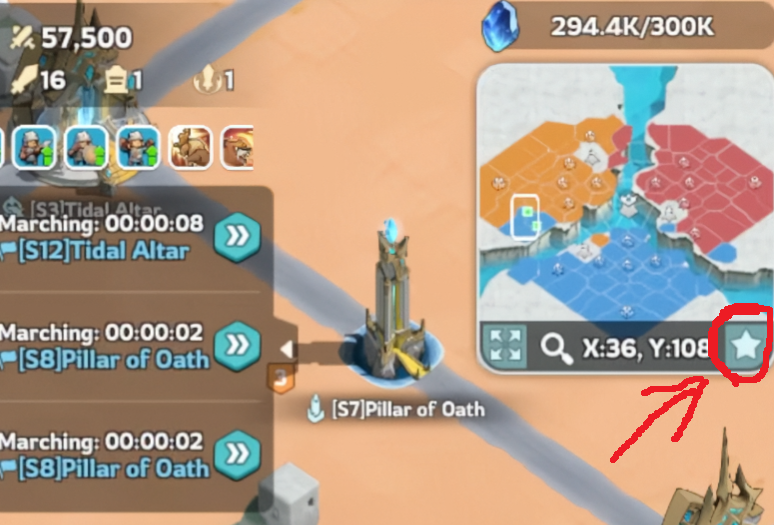
2. How to find the newest labels
Click the star icon next to the mini-map, then look for the alliance labels. ⭐🗺️🏷️
Route Plan
We will command our teams by setting labels. If a team sees its label on a building, the whole team should move toward this building through desired routes.
Below are some possible routes for a team to reach its target building:
1. Our HQ is in the south:

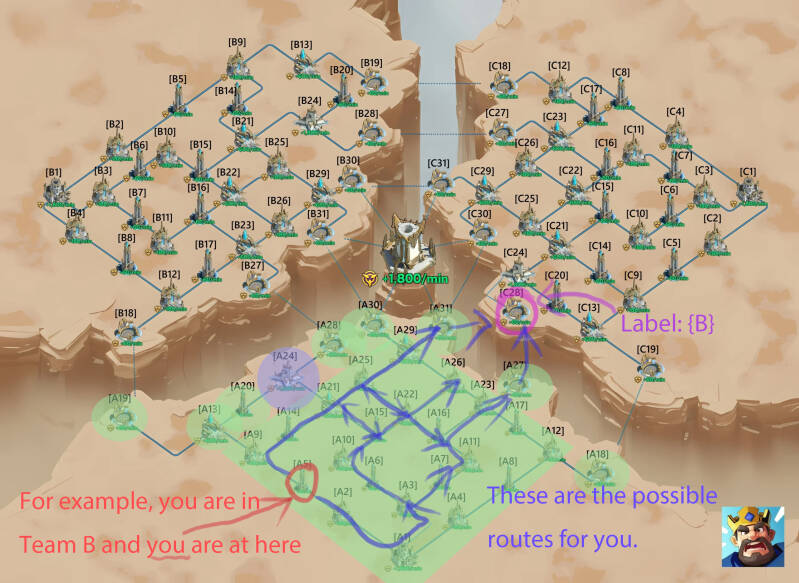
2. Our HQ is in the north west or north east
Just follow the same logic as the route above. Routing is simple: randomly choose one of the shortest paths to the labeled building.
Basic Tactic
Transit Hubs are the only buildings that allow troops to move across territories and reach the Temple. Therefore, one of the basic tactics is to control and defend these Transit Hubs.
Since you have three marches, try to leave one march at a Transit Hub along your route. This provides a defensive presence and helps prevent the enemy from cutting off your supply route.
The visualization below will help you understand this tactic more easily. 👇🗺️

Create Your Own Website With Webador